React Installation Made Easy: Follow These Simple Steps for Quick Setup
Setting up a React Environment for development.

I am a web3 developer and I am passionate about CyberSecurity
Also writes on Medium - medium.com/@sahilchandravanshi/
To install the react package into your project, you need to install it using a package manager (such as npm or yarn ).
I am using the Node Package Manager (npm) here.
npm install react
If you'd like to set up a local React project on your computer, then it's recommended that you use Vite or create-react-app. I am using Vite here.
Scaffolding Your First Vite Project
Open your terminal of choice, then run the following command:
npm create vite@latest
Then follow the prompts!
Vite simplifies your life by asking you questions.
First, Vite asks for your project name. Type your Project name and press Enter.
Select framework -> react
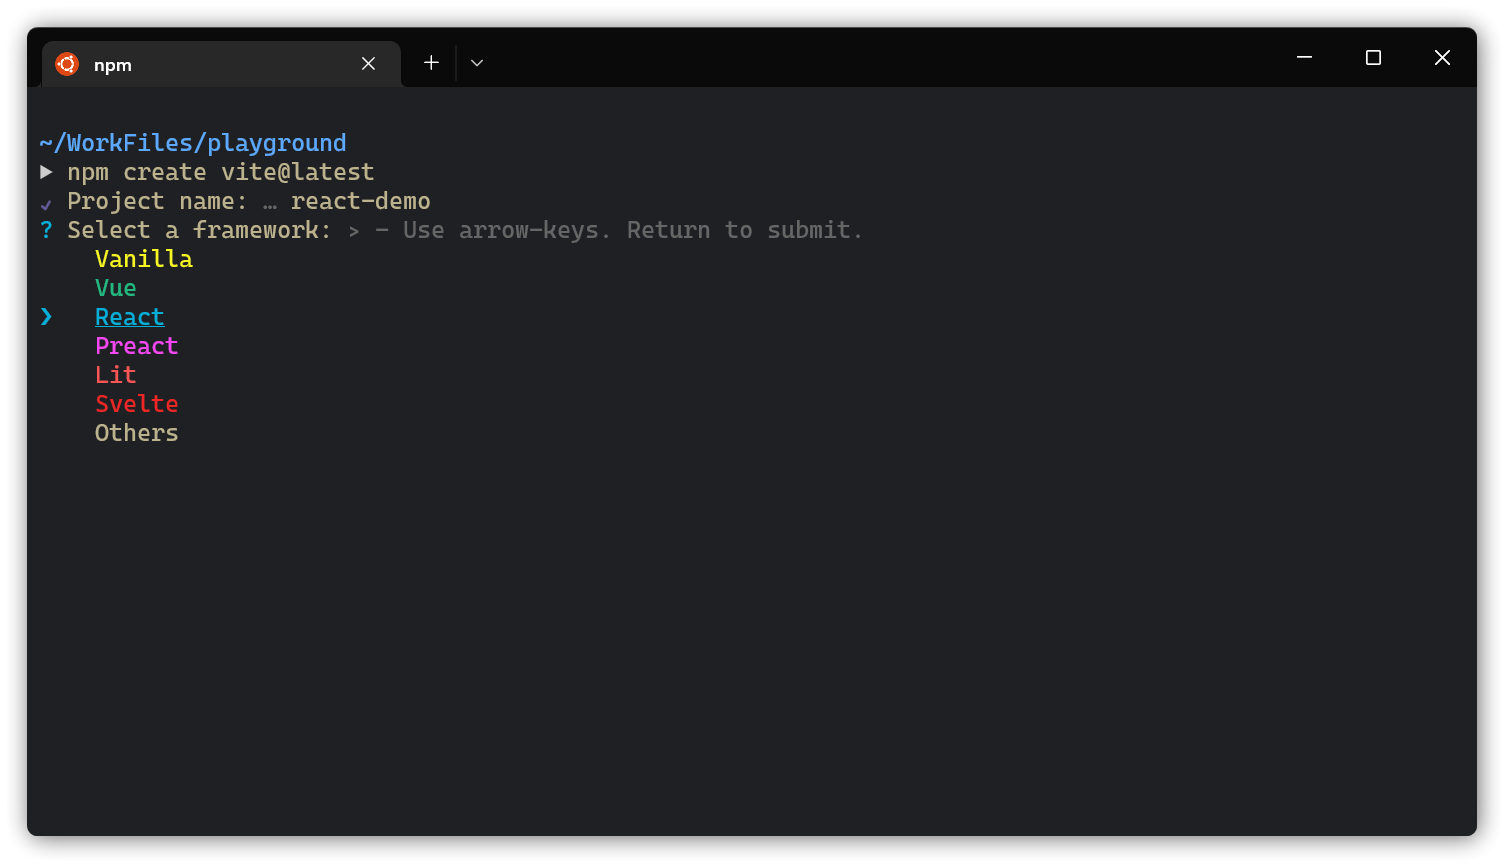
Now, select JavaScript or JavaScript + SWC based on your preference.
I recommend you go with JavaScript + SWC as SWC's React Fast Refresh implementation is a lot faster than Babel, and for some projects, it is now a better alternative.
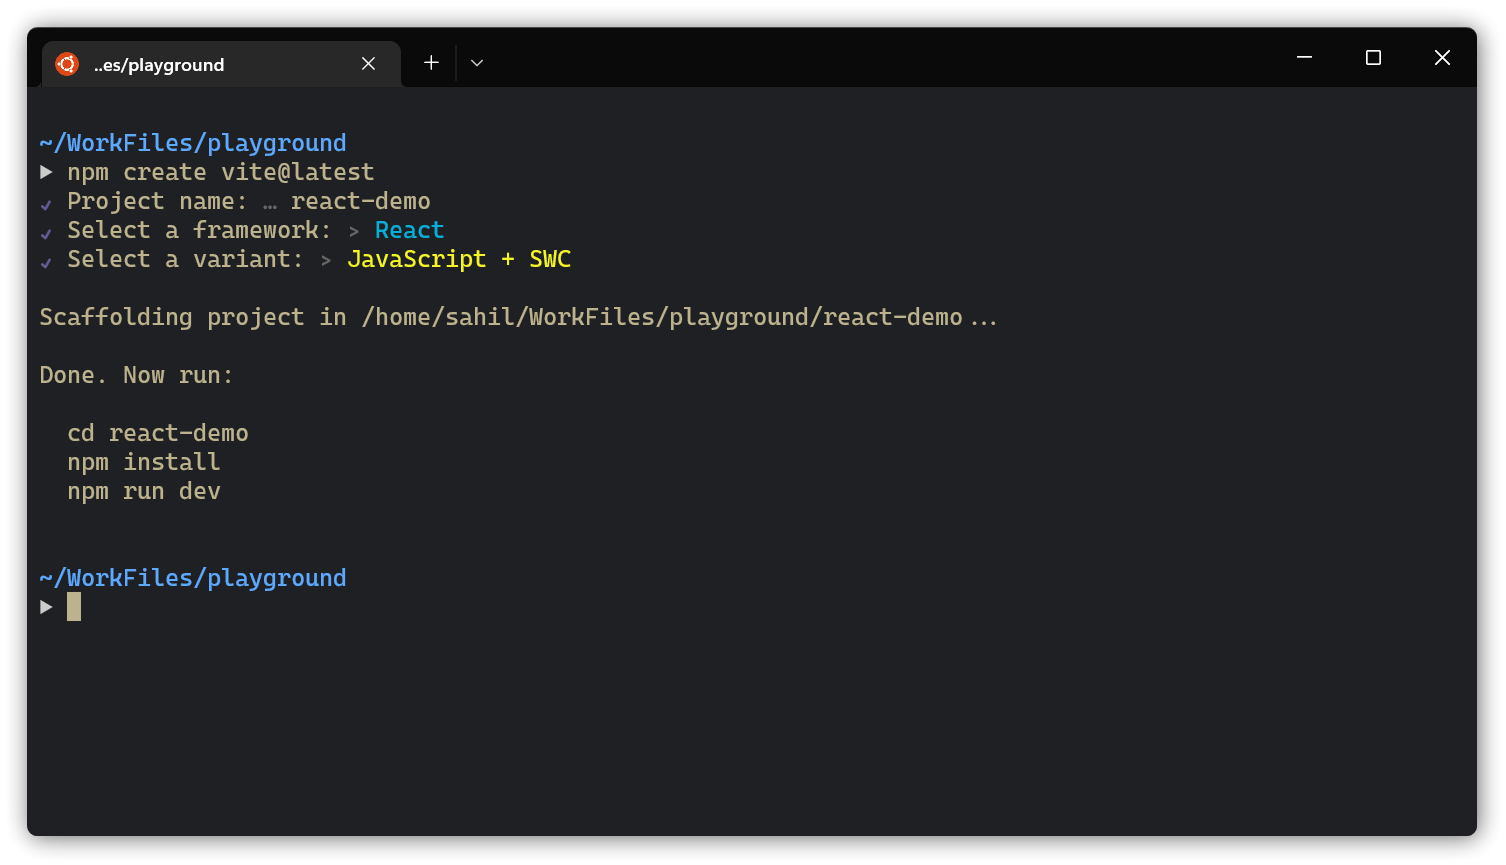
- Once the command has finished running,
cdinto your project folder and run the following commands:
cd react-demo # Vite made a new folder named after your project
npm install
npm run dev

Once everything is set up, look how quickly Vite served the app - just 5 seconds! That’s the magic of Vite.
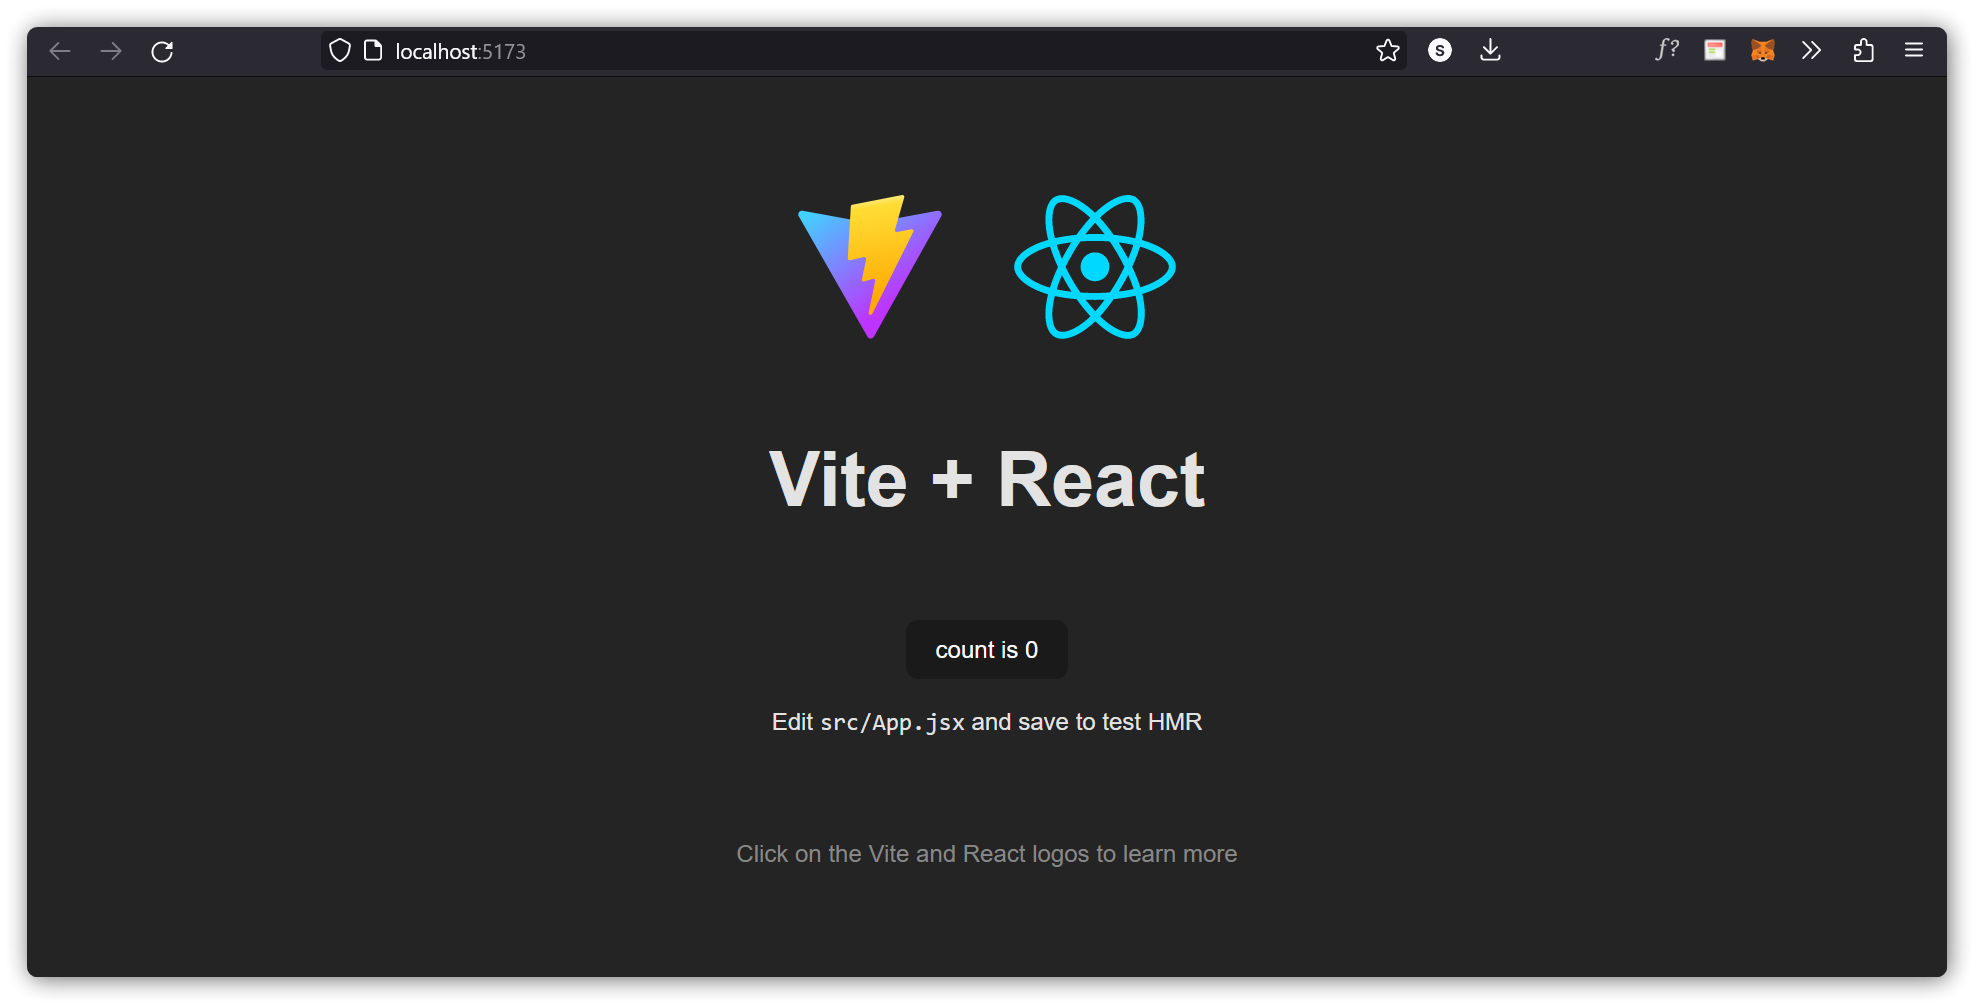
Next, open localhost:5173 in your browser. You will see Vite's default template:
Modify the React Application
So far so good, but how do I change the content?
Look in the react-demo directory and you will find a src folder. Inside the src folder there is a file called App.jsx, open it in any text editor of your choice
( I am using VSCode ) and the code will look like this:
import { useState } from 'react'
import reactLogo from './assets/react.svg'
import './App.css'

function App() {
  const [count, setCount] = useState(0)

  return (
    <div className="App">
      <div>
        <a href="https://vitejs.dev" target="_blank">
          <img src="/vite.svg" className="logo" alt="Vite logo" />
        </a>
        <a href="https://reactjs.org" target="_blank">
          <img src={reactLogo} className="logo react" alt="React logo" />
        </a>
      </div>
      <h1>Vite + React</h1>
      <div className="card">
        <button onClick={() => setCount((count) => count + 1)}>
          count is {count}
        </button>
        <p>
          Edit <code>src/App.jsx</code> and save to test HMR
        </p>
      </div>
      <p className="read-the-docs">
        Click on the Vite and React logos to learn more
      </p>
    </div>
  )
}

export default App
Try Changing the JSX inside the div with className App and save the file.
Notice that you do not have to reload the browser! Changes are visible immediately after you save the file.
Example:
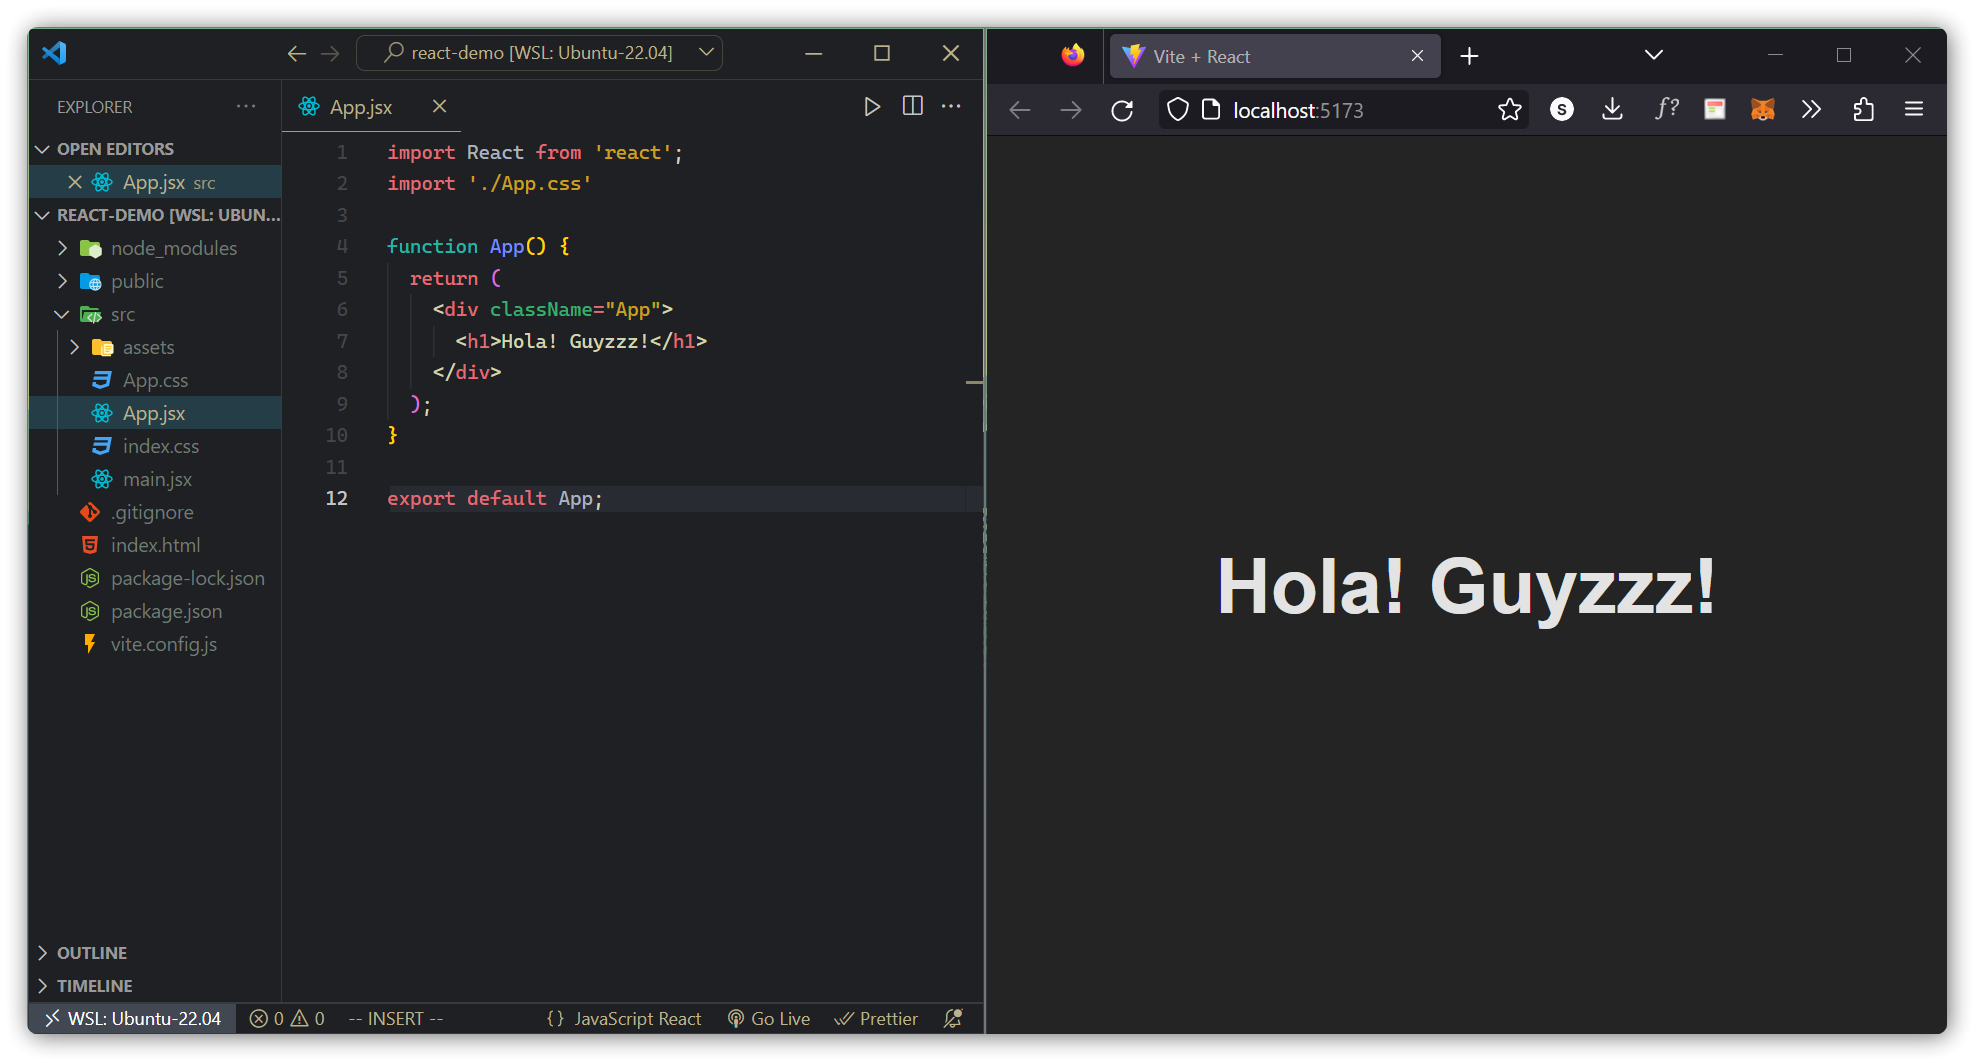
Replace all the content inside the <div className="App"> with a <h1> element. See the changes in the browser when you click Save.
import React from 'react';
import './App.css'

function App() {
  return (
    <div className="App">
      <h1>Hola! Guyzzz!</h1>
    </div>
  );
}

export default App;
Notice that we have removed the imports we do not need (react.svg and useState)
The result:
What's Next?
Now you have a React Environment on your computer, and you are ready to learn more about React.